The Iron Craft Challenge for this week was to take inspiration from your home town. I am from Chicago but I haven't lived there since I was very small.
I don't remember living in the city but I do remember countless trips there to visit family and the thing that sticks out most in my mind is seeing the skyline as we came into the city. I decided to take my inspiration from that skyline and created two projects using it. One is a card I sent to my Uncle who is ill and the other is a cuff bracelet embroidered with the skyline.
This is the tute for Goldie the gold fish toy I made for the Midas touch challenge at Iron Craft. The Cat loves this toy so much I have to hide it from him or he will drag it around the house and get the stick caught on stuff and knock stuff over.
I used orange felt as well as a teeny bit of black for the eyes, two orange pom poms, duct tape, one set of chop sticks but you could use a wooden dowel, A straw if you use chop sticks, three 2 yard lengths of yarn braided together, scissors, a jingle bell, stuffing, the pattern, pins and a needle, embroidery floss in a coordinating color and thread in a matching color.
You will also need the pattern which I tried to mark clearly to indicate where everything goes. Print the pattern at full page to get it the correct size which is 11 x 8.5 aka a standard sheet of copy paper.
Cut two pieces out for the body and the bottom fin and one piece out for the top fin. If you want to add scales with the embroidery floss do that now and remember that those are the right sides so they need to be inside when you are sewing.
Pin the pieces together with the fins and the yarn on the inside then sew along the area marked on the pattern in a dotted line. This is a fan tailed gold fish so she needs to have the two tail fin pieces separate. Leave it open at the tail end so you can turn it right side out then stuff it and put the bell in. Sew up the back with a whip stitch or a back stitch.
Now comes the eyes. Cut small circles out of the black felt then sew them onto the pom poms. Next sew the pom poms onto the area where the eyes would be. This gives Goldie bug eyes like any good fancy gold fish should have.
Now onto attaching her to the fishing rod. I didn't have any dowels around when I made this project but I had just eaten some Chinese take out so I had a pair of chop sticks. I secured them with the flat ends together using tape then I strengthened them with a straw over the place where they were joined. I used blue painters tape there but you could use the duct tape as well. Tape over it several times to make it stronger.
I used gray duct tape because I couldn't find my pretty duct tape but with all the crazy colors and patterns out there you could use any color you want. I taped the string down first to make sure it would be secure while I was covering the chop sticks. I put the tape on at a diagonal so it would cover the sticks with a little more ease but I still had to finesse it a bit to get it flat and to cover the sticks.
This weeks Iron Craft challenge was to create something using metallic gold. This was a bit of a challenge for me because I don't like gold. I decided to be a rebel and do two projects one that was gold in name only and one using metallic gold. The rebellious project is a goldfish string toy for The Cat. I'll be doing a tute for it later this week so keep your peepers peeled for that.For the other Project I stayed true to the challenge theme and used some gold yarn I picked up in a bag of random yarns at a thrift store. I had never done plastic canvas before but I had a few sheets that I used for billed crocheted hats. I decided that I would use this challenge to learn something new so I made a simple cube box using the gold yarn. I like the dimension that the plastic canvas gives and I'm going to get supplies to do some more projects in the future.
These are the instructions for making the felt key chain like the one I made for The Man for his Valentines Day gift. Since I made the key chain without taking pics I had to make a new one to do the tutorial. Since he doesn't need another key chain I decided I'd make a luggage tag for The Mom because she will be going to Germany to visit The Brother and Family soon. ;) (Yes they all sound capitalized in my head as if they are titles.)
To get started you'll need some felt in various colors, a good sharp pair of scissors, some pins, a key ring, a pencil, a scrap sheet of paper, something round to make a template with, a two inch long piece of inch wide ribbon, an embroidery needle and some embroidery floss. If you don't want to free hand a design you can also find something on the internet to print or look in a coloring book.
The first thing you need to do is make your pattern. Trace your round object onto some scrap paper then cut it out. I used a candle that measured 2.5 inches across at the mouth for the key chain and a cup that measured 3.75 inches across the top for the luggage tag. Fold over the felt with enough room to lay the circle a half inch from the folded edge. I marked a notch on my template the width of my ribbon so I could make sure my tab would cover it up.
Now cut it out making sure to leave the tab connecting the two circles together in the middle. It is going to look something like a cross between a barbell and Elton Johns glasses. That tab in the middle is what is going to attach to the key ring, the ribbon is just for stabilizing it and making the tab stronger. You will want to cut out your shapes for the applique the same way only you won't use two layers.
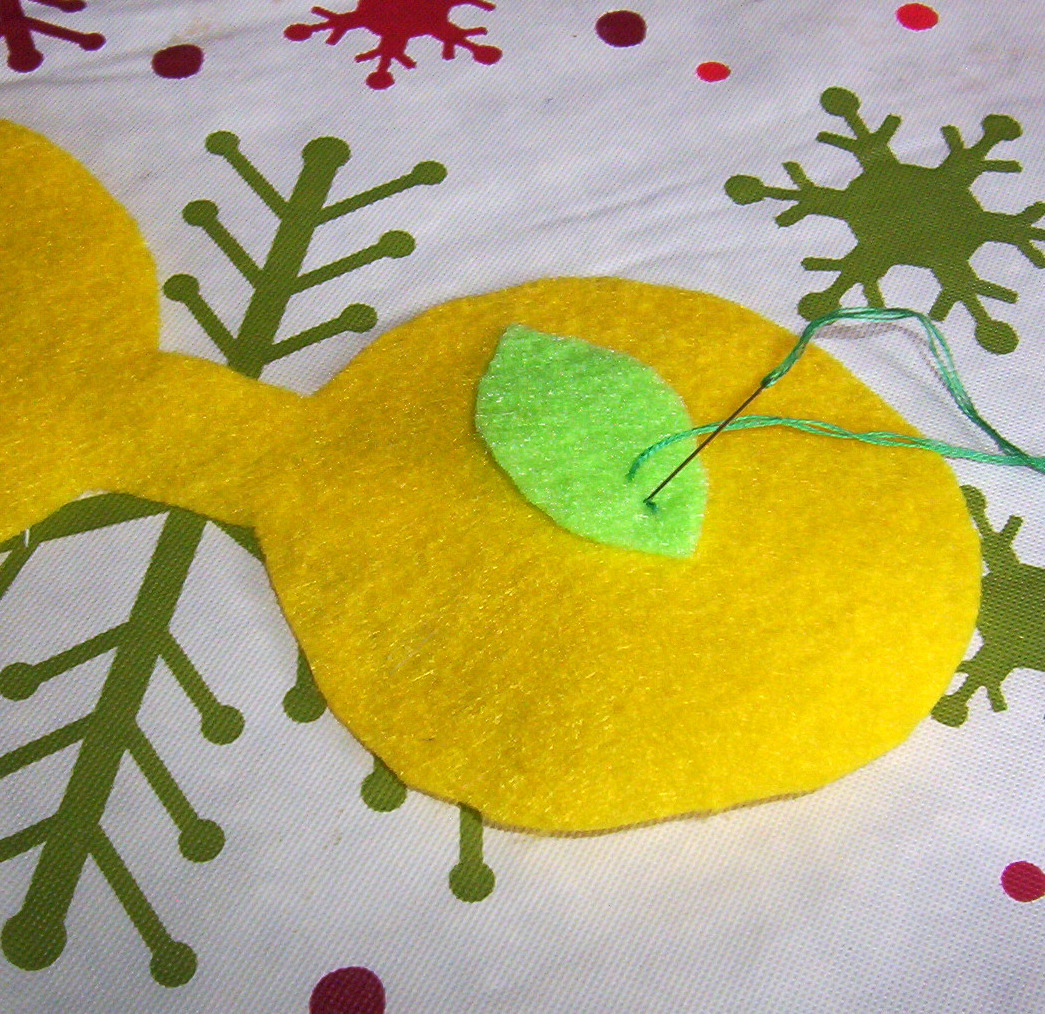
Now you need to check your shapes and figure out what layout you want to use. I did a purple flower with a green leaf under it and an orange center. I did this so that I could make sure that all of the pieces would fit onto the circle and work out where they would go before I started stitching them down.
I used a basic back stitch embroidery stitch here to stitch the pieces down and add some design to it by putting in veins, I also used a french knot in the middle to make some dots. The more stitching you use the more secure it will be but don't go over board with stitches. I also used the same back stitch to stitch her initials onto the backside of the tag. If you are putting letters on it I recommend lightly writing them onto the felt with a marker of the same or close to the same color as the floss you will be using.
Now you need to sew the ribbon onto the key ring so that it won't move while you are stitching the felt together around it. That isn't a very good pic but you get the idea of it. The stitch you use doesn't matter because no one will see it. All that matters is that it is secure on the key ring.
Next thing you gotta do is get the ring in the middle tab there. I rolled up the initialed side and put it through the ring. The appliqued side is too thick. Now you need to stitch the two sides together. You could pin them to make sure they don't shift while you are sewing but I find that felt sticks to itself so I don't need pins.
When you are starting your first stitch with a new piece of floss you should hide the knot between the layers. I don't know what the name of the stitch I used for the tag is but a regular back stitch has a sloppy side which I figured out with the key chain. Which ever way you decide to stitch it together is fine as long as it is neat on both sides.
Also remember to position the ribbon under the tab while you stitch so that it is hidden. The ribbon makes the tab stronger than felt alone. If you were hanging heavy keys off of it or if it got pulled on often the felt alone might tear.
Stay tuned for the tutes for a felt catnip toy and the fold top felt bag.
When I found out that this weeks Iron Craft challenge was Valentines I decided that I couldn't make just one, I had to make three. I made one for The Dog, one for The Cat and one for The Man because they all deserve a Valentine. I didn't set out meaning to use felt for all of the projects it just fit each one. I'll do tutes for all of these within the next week so if you like one check back to get the instructions.
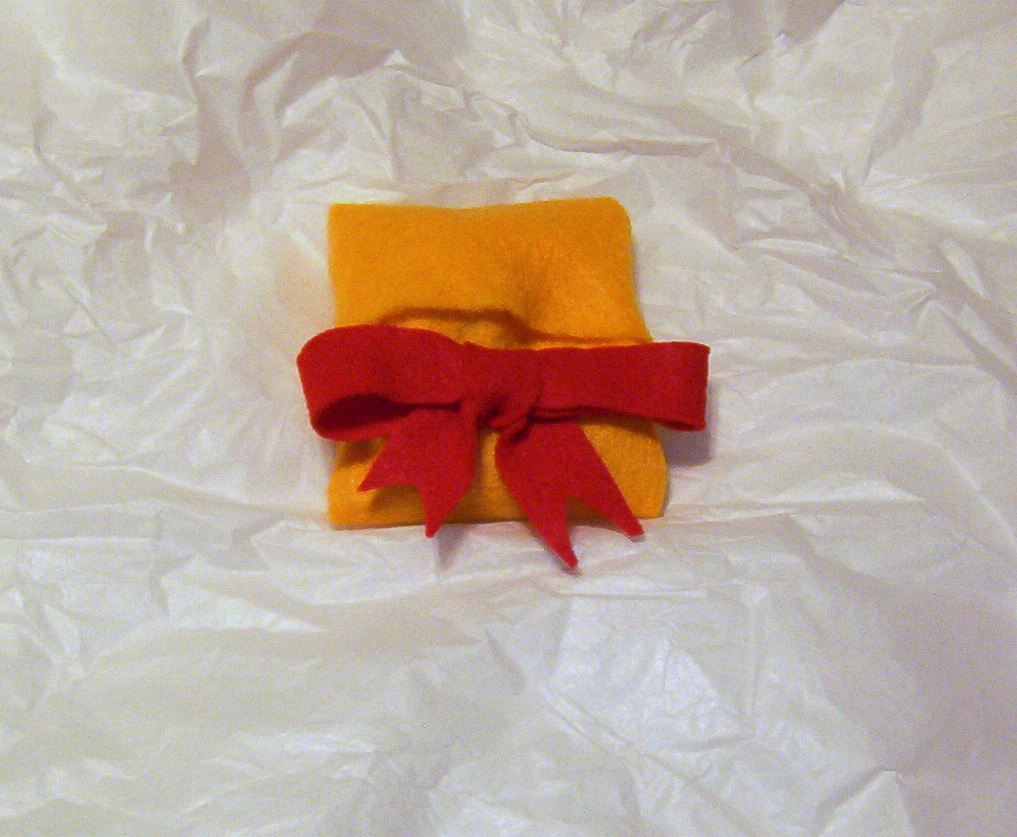
The Dogs birthday is very close to Valentines Day so I decided that his could double as a birthday gift as well. I didn't make the doggy biscuits but I did make the gift bag they came in. I got inspired by a set of reusable snack bags I saw on angry chicken but I made mine out of felt and I hand sewed it. I made a cute red bow out of felt and sewed it on as well.
The Cat loves toys and catnip so the obvious choice for him was a catnip toy. This one is a bunny and we have named it Mr. Bun Bun. The Cat has been enjoying Mr. Bun Buns company for a few days now and I think I might make him a whole set of felty friends to go along with Mr. Bun Bun. I know he probably has a mousy friend in his future.
The Man was a little harder to find inspiration for. He is a guy after all and he doesn't really like the traditional Valentines Day sorts of things. Chocolate is always appreciated, heart shaped boxes, not so much. I wanted his Valentine to be useful so I finally decided on a key chain. I cut out a red heart and embroidered it onto black felt then embroidered I (heart) you on the other side.
I am really enjoying these Iron Craft challenges. They are fun and they make you stretch your creative muscles a bit. They are also a nifty way to share your creativity with others. If you haven't checked it out yet you should.
Before today when I would go for a walk I would just carry my water bottle around. Now I don't have to because I made a sling to carry my bottle in that leaves my hands free to use my stop watch and my mp3 player. I just slip the handle around my wrist and go. I used worsted acrylic yarn and a J hook. Gauge isn't really important because it stretches to fit many kinds of bottles.
Ch 4 join with sl st to make a ring
Rnd 1 ch 4 (counts as a dc and ch 1 throughout) *dc in the ring ch1* repeat from * 8 times. Join with sl st in the third ch.
Rnd 2 ch4 *dc ch 1 twice in the ch space* repeat from * 8 times. dc ch 1 in the last space join with sl st to third chain
Rnd 3-12 ch 4 *dc ch1 in the next ch space* repeat 18 times join with sl st to third ch
Rnd 13 ch 1 sc in the first st then in each st and ch space around join with sl st
Handle ch1 sc in the next 5 sc ch1 turn repeat until it measures 8 inches. Fasten off and leave a long tail for stitching. Fold over and stitch it to the sc rnd several times to make it secure and strong. Tie off and weave in the ends.


