Last night I was craving something sweet but we were out of just about everything to make goodies except for the fixings for peanut butter cookies. Well, I wavered on making them because it takes a good long while to make them and it was too hot to have the oven on for that long. My solution was to try making peanut butter muffins instead. I figured that a dozen muffins would take about a quarter of the time to make as two and a half dozen cookies. I'm going to try to play with this recipe a little more and make a PB&J muffin later on. For now the plain peanut butter muffins are as follows:
1 1/4 cups of AP flour
1 tsp of baking soda
1 tsp baking powder
1/4 tsp salt
1 cup of milk
1 cup of peanut butter (chunky or smooth)
1/2 cup granulated sugar
5 tbsp melted butter
1 egg beaten
Preheat the oven to 350 degrees and grease or line 12 muffin cups. Sift the first 4 ingredients together and set them aside. Mix together rest of the ingredients thoroughly and then combine the dry into the wet. Mix them well but not too much. Evenly fill the muffin cups about a third of the way full and bake for 20 to 25 minutes until a toothpick inserted into the middle muffin comes out clean. Remove from the pan immediately.
This week the Iron Craft challenge theme was postcards. At first I was rather stumped because paper is not my usual medium but I tried a few things. The first ones I did were altered book pages and they are too embarrassing to show pictures of. Then I got some scrapbook paper and tried some things with it. Those are slightly less embarrassing, enough so that I can show pictures. The first is an owl and the second is a masquerade mask of an owl.


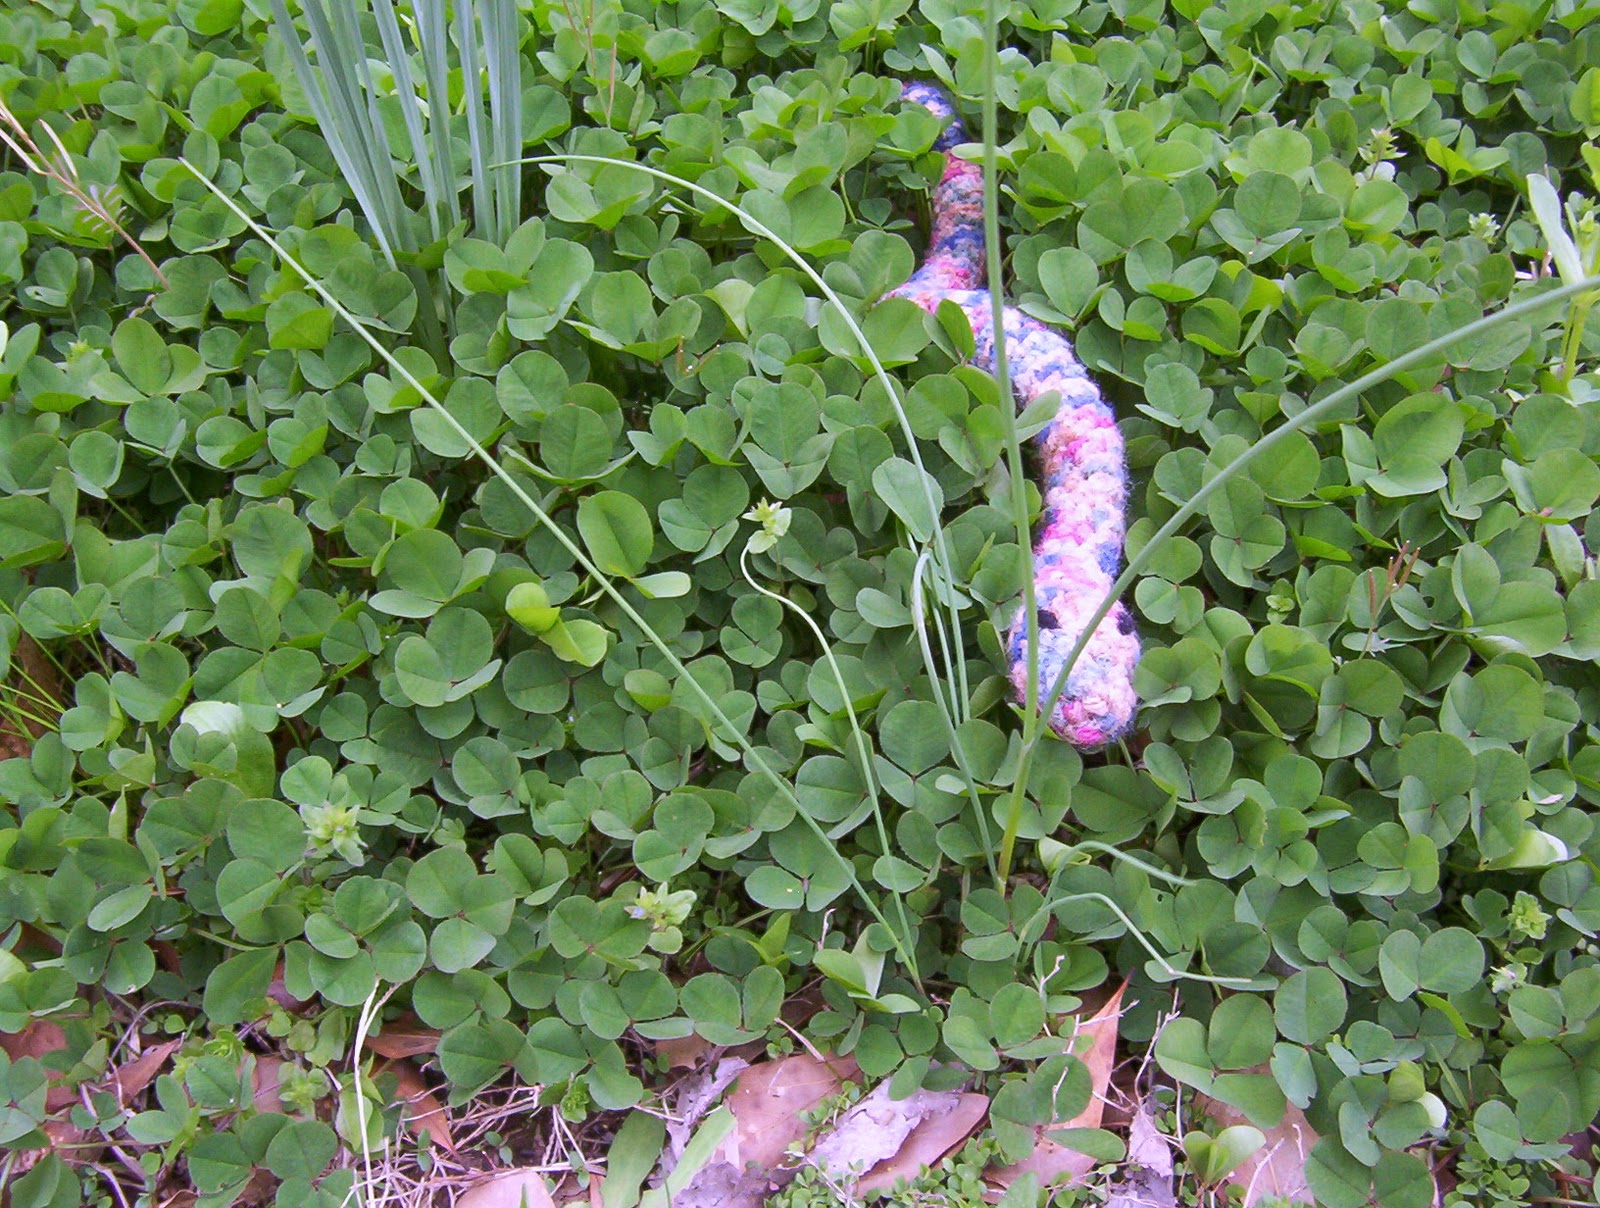
This week the Iron Craft challenge was "Best In Show" aka pets. Since I had made a bunch of cat toys prior to this challenge I decided I didn't want to make another. I Also couldn't come up with anything to make for The Dog. He is old and doesn't play much and would rather sleep on an old pillow or blanket than a pet bed. I eventually decided that I would make a pet for myself. Yes a completely inanimate and not real pet but one that I've wanted pretty much my whole life, a snake. See The Mom is deathly afraid of snakes so I will never be able to have one. I have always been fascinated by snakes, more than likely her reaction to them is what sparked that fascination after all when you're six being able to make your mom scream like a baby is pretty entertaining.

Recently I blogged about a vintage craft book I received and said I would be trying one of the projects soon. Well life sort of got in the way and I didn't do the project I had set out to do. This past week I did create a project using inspiration from the vintage book.
In the book there are crocheted pillows with ruffled trims and embroidered details. I decided I would update that pillow and do my own thing. I started out making the grid with scrap colors and I liked it but a new idea came to me as I was crocheting. I set that project aside (I'll be going back to it) and I picked up some black, grey and baby pink red heart yarns.

Long checked strip make two. With color A Ch 9 sc in the 2 ch from the hook and across 8 scs. Sc across for ten rows then change to color B. Sc for 10 rows then change to color A. Change color every ten rows twice more to end up with 50 rows. Fasten off
Single block make 2 of color A and 4 of color B. Ch 9 sc in the second ch from the hook and every ch across. Ch 1 turn sc in every sc across repeat until there are ten rows. Fasten off.
Middle pannel sew three blocks together with the chain edge on the bottom in order BAB. With color A join with a sl st in the corner of this strip ch 1 and sc in each sc across 24 scs. Repeat this row 29 times to get 30 rows. Fasten off. Sew the other three single blocks together in the same manner as before then sew them onto the top of the middle panel.
Back pocket ch 41 sc in the second ch from the hook and across. Ch 1 sc across until the piece is 40 rows. Fasten off.
Back flap ch 41 sc in second ch from hook and across. Ch 1 sc across 17 more times until there are 18 rows. Ch 1 sc in the next 4 sc ch 2 sk 1 sc * sc in the next 9 sc ch 2 sk 1 sc repeat from * twice more then sc in the last 5 scs.
Assembly: Sew the side strips to the middle panel then attach the motif or medallion onto the front of it being careful not to skew the medallion. Then with right sides facing sew the back pocket panel onto the front panel on three sides and the flap onto the top with the button holes facing the pocket panel. ONLY SEW THE FLAP ON THE TOP SEAM. Sew the buttons onto the pocket flap on the 8th row in corresponding stitches to the button holes.
This week the Iron Craft challenge theme was "Wanna Get Lucky?" The point was to draw inspiration from something that is considered lucky somewhere in the world. I had a bit of a snag at first because I wanted to do Rachel Morgans lucky charm handcuffs from The Hallows series by Kim Harrison. The problem was I couldn't find the right charms and I couldn't get the supplies to make them.
I thought for a while and got kinda ticked about it but then I realized I have "lucky" inspiration staring me in the face in almost every room of my house. The Mom collects elephants which are supposed to be lucky. Well she doesn't actively collect them everyone she knows collects them for her.
So with new inspiration at hand I ran to the store and bought some suitable elephant yarn and searched the interwebs (mainly Ravelry) for an elephant crochet pattern. I found this one from Better Homes and Gardens. I didn't add the sash and head scarf and I kinda put his head on lopsided but I think it made him cuter. He looks a little like a curious kitten this way.
I had never completed an amigurumi pattern before because it makes my hands hurt after about ten rounds. I toughed this one out and finally got all of my pieces made. Making the pieces took a lot less time than I thought they would and assembly took a lot more time than I had figured on. I went through all of Monday nights tv and a Poirot DVD to get this one done. Oh I broke my plastic G crochet hook too. I almost never use that one and I guess I'm sticking with steel ones in the smaller sizes from now on.
I'll do more amigurumi in the future but I think I'm going to stick to smaller animals. I have an adorable little bee pattern and an owl one I've been looking at for a while. I am really loving that Iron Craft is pushing me to do things I haven't done before.
This week the Iron Craft challenge was the color green. I decided to make a lapghan for The Man for his birthday coming up. To go with this challenge I used Red Heart yarn in Bright Yellow, Royal Blue and Paddy Green and a simple double crochet ripple pattern. I found the pattern on the Lion Brand Yarn website, it is called Spring Ripple Throw. It was an easy pattern to keep up with because the repeat goes in threes. You double crochet for three stitches then double crochet three together then double crochet for three stitches and then increase by three in the next stitch. It became like clockwork after a few lines.
This weeks Iron Craft challenge theme was movies. I took a long time trying to get some inspiration for my project. I finally realized that the best part of most movies are the memorable lines so I decided would use a line from my favorite movie The Princess Bride as my project. I cross stitched "As you wish." out and then glued it into a card. I chose to make a card because The Mans birthday is coming up and anyone who has seen the movie knows that when Wesley says "As you wish." to Buttercup what he is really saying is "I love you."