Ok, I'm gonna do this fast because I've got more packing to do. This week Iron Craft moved to Just Crafty Enough and the challenge this week was to make something with buttons. I didn't take this challenge literally, I decided to make pretend buttons on my project instead. I came up with a quick basic cross stitched button motif then cross stitched it in a grid on two pieces then followed the directions for a biscornu. I think it turned out cute, I might add a magnet backing on it and turn it into a fridge magnet.
Here is the first one I made for the May Flowers challenge: http://24footstreet.blogspot.com/2011/05/iron-craft-18-aprill-showers-floral.html
This week the Iron Craft challenge was to make camp crafts. I was at a loss because when I went to camp we didn't do crafts. I did a search online for camp crafts and came across several I liked including friendship bracelets. I kept them in my head while I was out running errands on Saturday. While I was shopping I swung by the crafts department and found a kit to make friendship bracelets. It came with 36 skeins of "friendship thread" aka pearl cotton embroidery thread. I thought about it for about two seconds and snapped up a kit.
My adult niece and her little boy are staying with us for a while so she and I decided to make these bracelets together. At first we were dumbfounded by the directions. I watched a few youtube videos which explained the patterns pretty well but not the method so I was still not getting good results. Eventually I figured it out on my own but it took some doing so I'm going to try to explain it a little better on here.
First off you need to measure out your thread, this measurement depends on your wrist size so you may need to experiment with how much you need. I have a seven inch wrist so I use twenty six inches of floss per strand. Cut two strands of each color for an easier bracelet or a single strand of six different colors for a more difficult one. You are also going to need some tape, a safety pin or a clip board to hold your thread as you work. I prefer the clip board but the others will do fine as well.
 |
| figure 1 |
Now tie a regular ole granny knot with all of the strands together leaving about a three inch tail. As an optional step to make wearing the bracelet easier braid that three inch tail and tie another knot to secure it. Secure your strands with your tape, pin or board and separate the strands by color. If you're doing three colors separate with the two strands of each color together, if you're doing six colors separate them as single strands.
 |
| figure 2 |
Working from left to right cross the first color over the top of the second color then under it and around it to form a loop. (figure 1) Now while pulling down on the second strand pull up on the first one and tighten it up to the top. (figure 2) Don't make your knots too tight, that causes it to buckle a bit. Tie that same knot again across each color, repeat the process for each row. When you are down to about three and a half inches of loose floss tie another granny knot with all of the strands making it flush against the knots. If you want to, braid that end as well. To wear them just tie the braided ends together.

I know that most people think of fruit when muffins are mentioned but The Man is not most people. He is a chocaholic in the extreme. Naturally with all this muffin making I was bound to come up with a chocolate recipe eventually. Eventually is the right word there because I went through several trial and error recipes to get to the final one and I also learned a very important lesson, if you're trying out a new recipe put a cookie sheet under your muffin pan just in case you have a spill over. Anywhoodles we love this version and I hope you will like it too.
Ingredients:
1/2 cup granulated sugar
5 tbsps melted butter
1 egg beaten
1 cup of milk
1 tsp vanilla extract
1/2 cup cocoa powder
1 1/4 cup all purpose flour
1 tsp each of baking soda and powder
1/2 tsp salt
1 cup of chocolate chips
Preheat the oven to 350 degrees and grease or line 12 muffin cups. Start off by mixing the first five wet ingredients together and then in a separate bowl mix the last five dry ingredients together. Slowly add the dry to the wet and mix it until it is just combined, don't over mix. Pour it evenly into the muffin cups and bake for twenty minutes or until a toothpick comes out clean.
 I haven't done a project for Iron Craft in a little over a month because the past few themes haven't given me any inspiration. This week was different, I came up with an idea almost immediately after reading the challenge theme. I embroidered four handkerchiefs two for my dad and two for The Man's dad.
I like the way they turned out. I printed the monogram and phrase out and then used washout pencils to trace them onto the handkerchiefs. After that it was a matter of simple back stitches. This is the sort of project I enjoy doing. Simple items that will get used rather than looked at. Pretty is nice but pretty and functional is better.
I haven't done a project for Iron Craft in a little over a month because the past few themes haven't given me any inspiration. This week was different, I came up with an idea almost immediately after reading the challenge theme. I embroidered four handkerchiefs two for my dad and two for The Man's dad.
I like the way they turned out. I printed the monogram and phrase out and then used washout pencils to trace them onto the handkerchiefs. After that it was a matter of simple back stitches. This is the sort of project I enjoy doing. Simple items that will get used rather than looked at. Pretty is nice but pretty and functional is better.
This week the Iron Craft challenge was to make something with or inspired by flowers. I decided immediately I was going to make a biscornu this week because I have been wanting to do one for quite a while now. I found a pattern that had flowers on it and I filled it with floral scented potpourri to make it a sachet or just a pretty smelling pin cushion.
I found the pattern on Own Two Hands as well as basic instructions on how to assemble it. It really is a simple assembly so don't be intimidated if you decide to make one. Just a quick tip though, make sure the pattern you use is filled in correctly. I found several spots on my pattern that were incorrect and I ended up having to make several corrections before finishing my project. I found several really cute patterns I'm going to make to give as gifts and even may design my own patterns for them. I don't even like cross stitching that much but I want to make a bazillion of these things.

Forgot to mention that the monogram pattern came from needlenthread.com.
This week the Iron Craft challenge was to make something inspired by money. I'm pretty sure there are a ton of change purses being submitted so far but I decided to go with one anyway. I decided to go with a change purse because thus far Iron Craft has pushed me to do things I have never done before and before this week I had never sewn in a zipper.


Last night I was craving something sweet but we were out of just about everything to make goodies except for the fixings for peanut butter cookies. Well, I wavered on making them because it takes a good long while to make them and it was too hot to have the oven on for that long. My solution was to try making peanut butter muffins instead. I figured that a dozen muffins would take about a quarter of the time to make as two and a half dozen cookies. I'm going to try to play with this recipe a little more and make a PB&J muffin later on. For now the plain peanut butter muffins are as follows:
1 1/4 cups of AP flour
1 tsp of baking soda
1 tsp baking powder
1/4 tsp salt
1 cup of milk
1 cup of peanut butter (chunky or smooth)
1/2 cup granulated sugar
5 tbsp melted butter
1 egg beaten
Preheat the oven to 350 degrees and grease or line 12 muffin cups. Sift the first 4 ingredients together and set them aside. Mix together rest of the ingredients thoroughly and then combine the dry into the wet. Mix them well but not too much. Evenly fill the muffin cups about a third of the way full and bake for 20 to 25 minutes until a toothpick inserted into the middle muffin comes out clean. Remove from the pan immediately.
This week the Iron Craft challenge theme was postcards. At first I was rather stumped because paper is not my usual medium but I tried a few things. The first ones I did were altered book pages and they are too embarrassing to show pictures of. Then I got some scrapbook paper and tried some things with it. Those are slightly less embarrassing, enough so that I can show pictures. The first is an owl and the second is a masquerade mask of an owl.


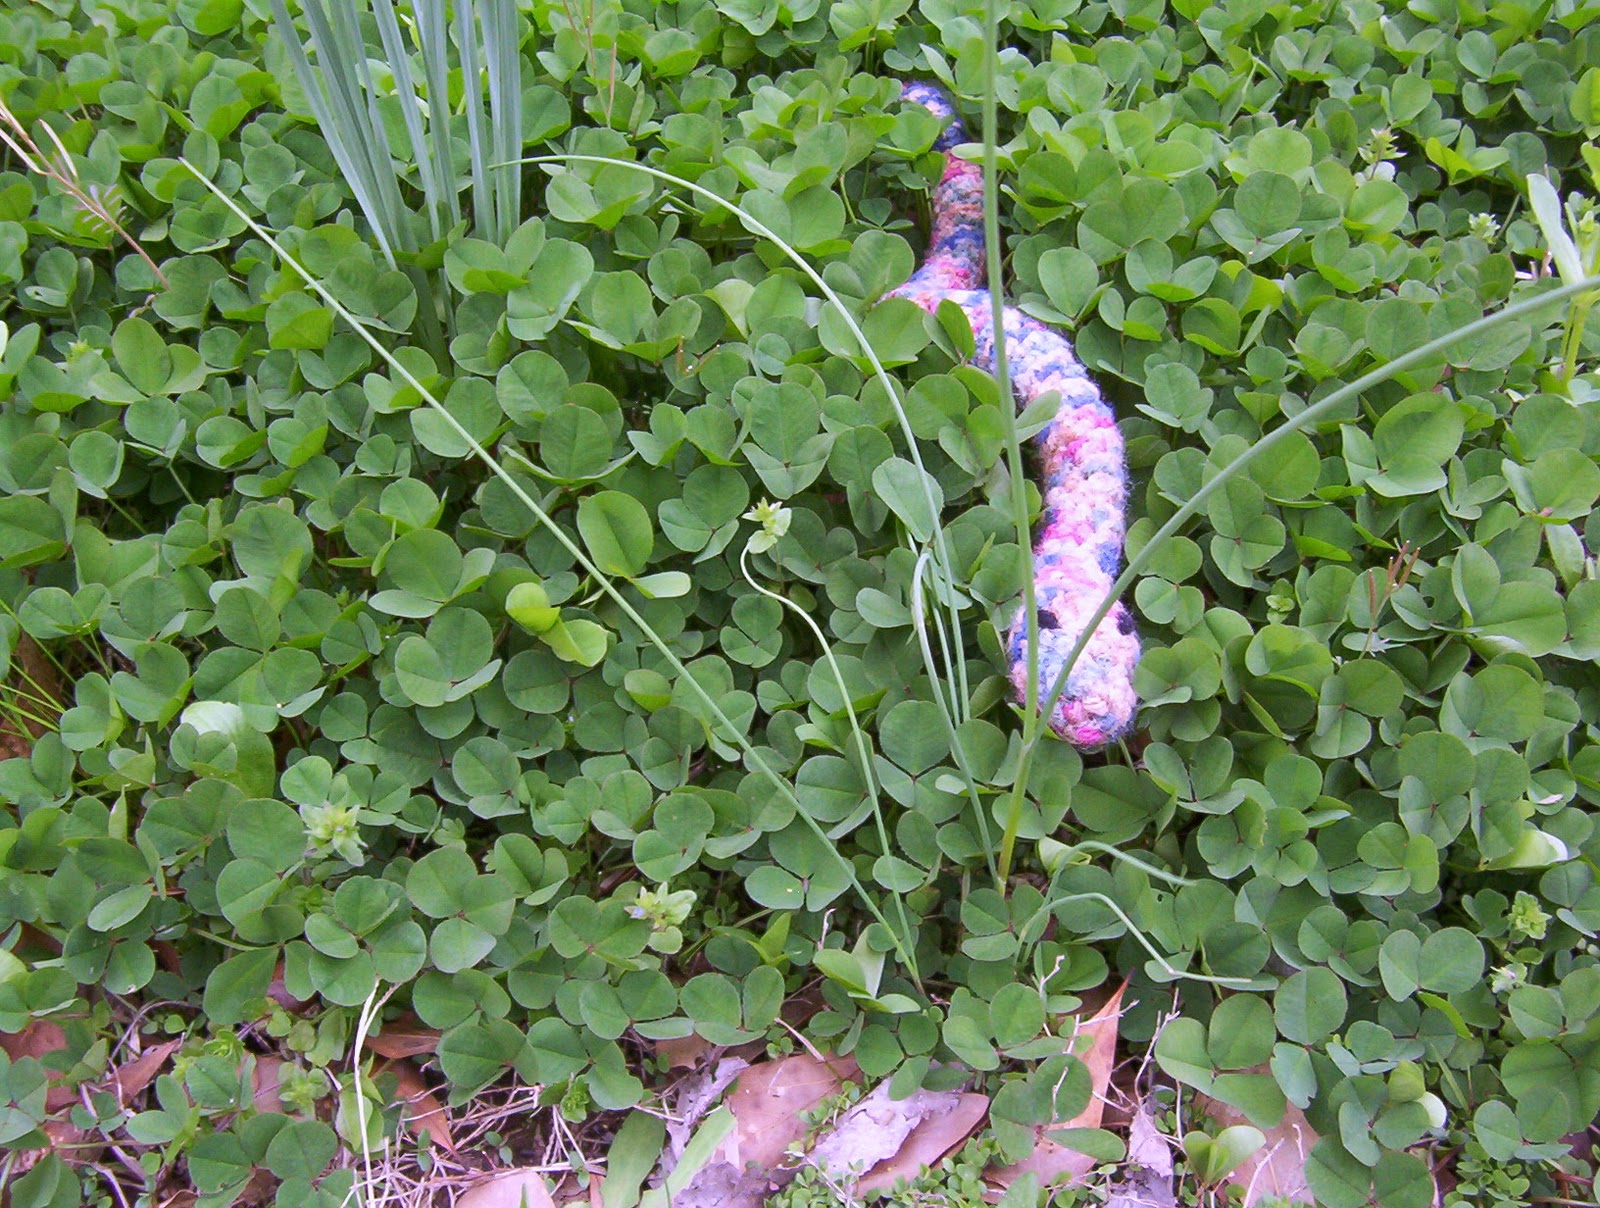
This week the Iron Craft challenge was "Best In Show" aka pets. Since I had made a bunch of cat toys prior to this challenge I decided I didn't want to make another. I Also couldn't come up with anything to make for The Dog. He is old and doesn't play much and would rather sleep on an old pillow or blanket than a pet bed. I eventually decided that I would make a pet for myself. Yes a completely inanimate and not real pet but one that I've wanted pretty much my whole life, a snake. See The Mom is deathly afraid of snakes so I will never be able to have one. I have always been fascinated by snakes, more than likely her reaction to them is what sparked that fascination after all when you're six being able to make your mom scream like a baby is pretty entertaining.

Recently I blogged about a vintage craft book I received and said I would be trying one of the projects soon. Well life sort of got in the way and I didn't do the project I had set out to do. This past week I did create a project using inspiration from the vintage book.
In the book there are crocheted pillows with ruffled trims and embroidered details. I decided I would update that pillow and do my own thing. I started out making the grid with scrap colors and I liked it but a new idea came to me as I was crocheting. I set that project aside (I'll be going back to it) and I picked up some black, grey and baby pink red heart yarns.

Long checked strip make two. With color A Ch 9 sc in the 2 ch from the hook and across 8 scs. Sc across for ten rows then change to color B. Sc for 10 rows then change to color A. Change color every ten rows twice more to end up with 50 rows. Fasten off
Single block make 2 of color A and 4 of color B. Ch 9 sc in the second ch from the hook and every ch across. Ch 1 turn sc in every sc across repeat until there are ten rows. Fasten off.
Middle pannel sew three blocks together with the chain edge on the bottom in order BAB. With color A join with a sl st in the corner of this strip ch 1 and sc in each sc across 24 scs. Repeat this row 29 times to get 30 rows. Fasten off. Sew the other three single blocks together in the same manner as before then sew them onto the top of the middle panel.
Back pocket ch 41 sc in the second ch from the hook and across. Ch 1 sc across until the piece is 40 rows. Fasten off.
Back flap ch 41 sc in second ch from hook and across. Ch 1 sc across 17 more times until there are 18 rows. Ch 1 sc in the next 4 sc ch 2 sk 1 sc * sc in the next 9 sc ch 2 sk 1 sc repeat from * twice more then sc in the last 5 scs.
Assembly: Sew the side strips to the middle panel then attach the motif or medallion onto the front of it being careful not to skew the medallion. Then with right sides facing sew the back pocket panel onto the front panel on three sides and the flap onto the top with the button holes facing the pocket panel. ONLY SEW THE FLAP ON THE TOP SEAM. Sew the buttons onto the pocket flap on the 8th row in corresponding stitches to the button holes.
This week the Iron Craft challenge theme was "Wanna Get Lucky?" The point was to draw inspiration from something that is considered lucky somewhere in the world. I had a bit of a snag at first because I wanted to do Rachel Morgans lucky charm handcuffs from The Hallows series by Kim Harrison. The problem was I couldn't find the right charms and I couldn't get the supplies to make them.
I thought for a while and got kinda ticked about it but then I realized I have "lucky" inspiration staring me in the face in almost every room of my house. The Mom collects elephants which are supposed to be lucky. Well she doesn't actively collect them everyone she knows collects them for her.
So with new inspiration at hand I ran to the store and bought some suitable elephant yarn and searched the interwebs (mainly Ravelry) for an elephant crochet pattern. I found this one from Better Homes and Gardens. I didn't add the sash and head scarf and I kinda put his head on lopsided but I think it made him cuter. He looks a little like a curious kitten this way.
I had never completed an amigurumi pattern before because it makes my hands hurt after about ten rounds. I toughed this one out and finally got all of my pieces made. Making the pieces took a lot less time than I thought they would and assembly took a lot more time than I had figured on. I went through all of Monday nights tv and a Poirot DVD to get this one done. Oh I broke my plastic G crochet hook too. I almost never use that one and I guess I'm sticking with steel ones in the smaller sizes from now on.
I'll do more amigurumi in the future but I think I'm going to stick to smaller animals. I have an adorable little bee pattern and an owl one I've been looking at for a while. I am really loving that Iron Craft is pushing me to do things I haven't done before.
This week the Iron Craft challenge was the color green. I decided to make a lapghan for The Man for his birthday coming up. To go with this challenge I used Red Heart yarn in Bright Yellow, Royal Blue and Paddy Green and a simple double crochet ripple pattern. I found the pattern on the Lion Brand Yarn website, it is called Spring Ripple Throw. It was an easy pattern to keep up with because the repeat goes in threes. You double crochet for three stitches then double crochet three together then double crochet for three stitches and then increase by three in the next stitch. It became like clockwork after a few lines.
This weeks Iron Craft challenge theme was movies. I took a long time trying to get some inspiration for my project. I finally realized that the best part of most movies are the memorable lines so I decided would use a line from my favorite movie The Princess Bride as my project. I cross stitched "As you wish." out and then glued it into a card. I chose to make a card because The Mans birthday is coming up and anyone who has seen the movie knows that when Wesley says "As you wish." to Buttercup what he is really saying is "I love you."
The Iron Craft Challenge for this week was to take inspiration from your home town. I am from Chicago but I haven't lived there since I was very small.
I don't remember living in the city but I do remember countless trips there to visit family and the thing that sticks out most in my mind is seeing the skyline as we came into the city. I decided to take my inspiration from that skyline and created two projects using it. One is a card I sent to my Uncle who is ill and the other is a cuff bracelet embroidered with the skyline.
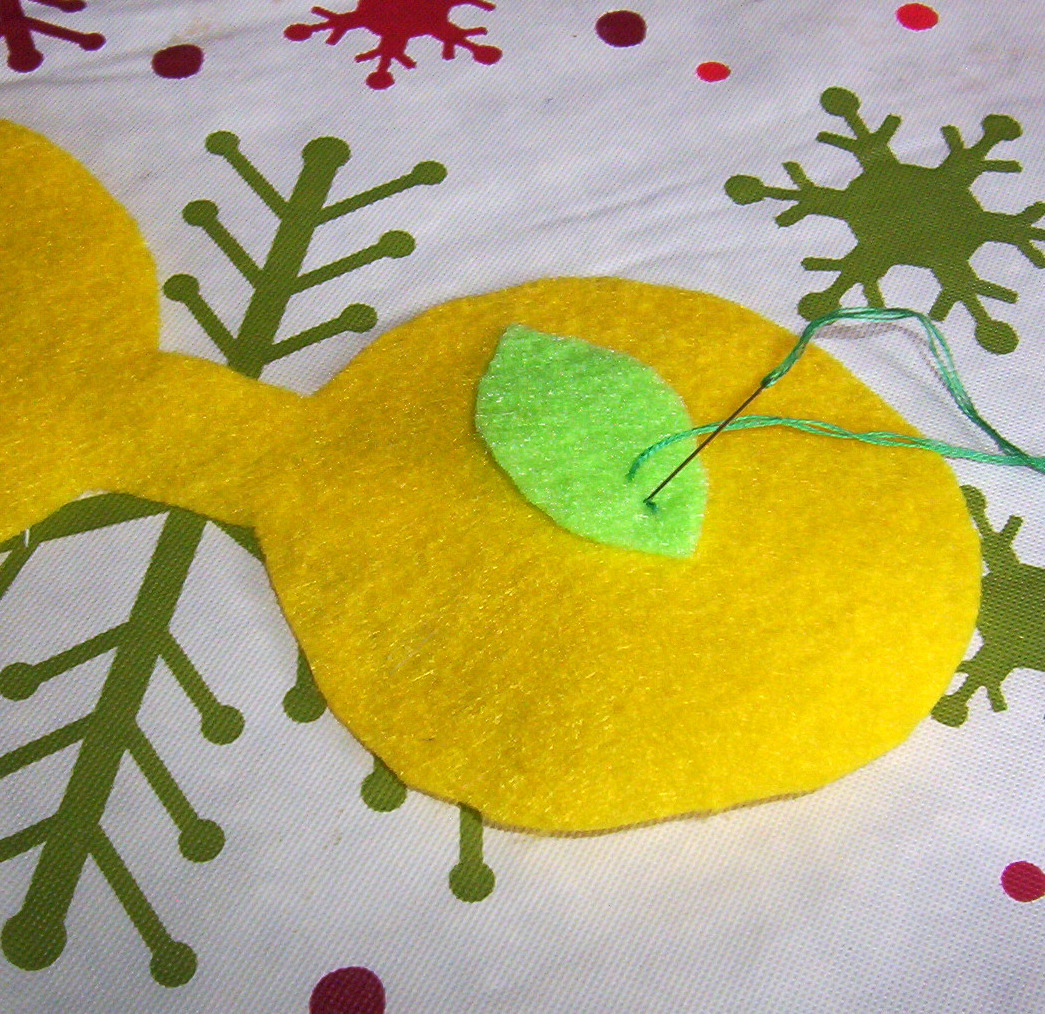
This is the tute for Goldie the gold fish toy I made for the Midas touch challenge at Iron Craft. The Cat loves this toy so much I have to hide it from him or he will drag it around the house and get the stick caught on stuff and knock stuff over.
I used orange felt as well as a teeny bit of black for the eyes, two orange pom poms, duct tape, one set of chop sticks but you could use a wooden dowel, A straw if you use chop sticks, three 2 yard lengths of yarn braided together, scissors, a jingle bell, stuffing, the pattern, pins and a needle, embroidery floss in a coordinating color and thread in a matching color.
You will also need the pattern which I tried to mark clearly to indicate where everything goes. Print the pattern at full page to get it the correct size which is 11 x 8.5 aka a standard sheet of copy paper.
Cut two pieces out for the body and the bottom fin and one piece out for the top fin. If you want to add scales with the embroidery floss do that now and remember that those are the right sides so they need to be inside when you are sewing.
Pin the pieces together with the fins and the yarn on the inside then sew along the area marked on the pattern in a dotted line. This is a fan tailed gold fish so she needs to have the two tail fin pieces separate. Leave it open at the tail end so you can turn it right side out then stuff it and put the bell in. Sew up the back with a whip stitch or a back stitch.
Now comes the eyes. Cut small circles out of the black felt then sew them onto the pom poms. Next sew the pom poms onto the area where the eyes would be. This gives Goldie bug eyes like any good fancy gold fish should have.
Now onto attaching her to the fishing rod. I didn't have any dowels around when I made this project but I had just eaten some Chinese take out so I had a pair of chop sticks. I secured them with the flat ends together using tape then I strengthened them with a straw over the place where they were joined. I used blue painters tape there but you could use the duct tape as well. Tape over it several times to make it stronger.
I used gray duct tape because I couldn't find my pretty duct tape but with all the crazy colors and patterns out there you could use any color you want. I taped the string down first to make sure it would be secure while I was covering the chop sticks. I put the tape on at a diagonal so it would cover the sticks with a little more ease but I still had to finesse it a bit to get it flat and to cover the sticks.
This weeks Iron Craft challenge was to create something using metallic gold. This was a bit of a challenge for me because I don't like gold. I decided to be a rebel and do two projects one that was gold in name only and one using metallic gold. The rebellious project is a goldfish string toy for The Cat. I'll be doing a tute for it later this week so keep your peepers peeled for that.For the other Project I stayed true to the challenge theme and used some gold yarn I picked up in a bag of random yarns at a thrift store. I had never done plastic canvas before but I had a few sheets that I used for billed crocheted hats. I decided that I would use this challenge to learn something new so I made a simple cube box using the gold yarn. I like the dimension that the plastic canvas gives and I'm going to get supplies to do some more projects in the future.
These are the instructions for making the felt key chain like the one I made for The Man for his Valentines Day gift. Since I made the key chain without taking pics I had to make a new one to do the tutorial. Since he doesn't need another key chain I decided I'd make a luggage tag for The Mom because she will be going to Germany to visit The Brother and Family soon. ;) (Yes they all sound capitalized in my head as if they are titles.)
To get started you'll need some felt in various colors, a good sharp pair of scissors, some pins, a key ring, a pencil, a scrap sheet of paper, something round to make a template with, a two inch long piece of inch wide ribbon, an embroidery needle and some embroidery floss. If you don't want to free hand a design you can also find something on the internet to print or look in a coloring book.
The first thing you need to do is make your pattern. Trace your round object onto some scrap paper then cut it out. I used a candle that measured 2.5 inches across at the mouth for the key chain and a cup that measured 3.75 inches across the top for the luggage tag. Fold over the felt with enough room to lay the circle a half inch from the folded edge. I marked a notch on my template the width of my ribbon so I could make sure my tab would cover it up.
Now cut it out making sure to leave the tab connecting the two circles together in the middle. It is going to look something like a cross between a barbell and Elton Johns glasses. That tab in the middle is what is going to attach to the key ring, the ribbon is just for stabilizing it and making the tab stronger. You will want to cut out your shapes for the applique the same way only you won't use two layers.
Now you need to check your shapes and figure out what layout you want to use. I did a purple flower with a green leaf under it and an orange center. I did this so that I could make sure that all of the pieces would fit onto the circle and work out where they would go before I started stitching them down.
I used a basic back stitch embroidery stitch here to stitch the pieces down and add some design to it by putting in veins, I also used a french knot in the middle to make some dots. The more stitching you use the more secure it will be but don't go over board with stitches. I also used the same back stitch to stitch her initials onto the backside of the tag. If you are putting letters on it I recommend lightly writing them onto the felt with a marker of the same or close to the same color as the floss you will be using.
Now you need to sew the ribbon onto the key ring so that it won't move while you are stitching the felt together around it. That isn't a very good pic but you get the idea of it. The stitch you use doesn't matter because no one will see it. All that matters is that it is secure on the key ring.
Next thing you gotta do is get the ring in the middle tab there. I rolled up the initialed side and put it through the ring. The appliqued side is too thick. Now you need to stitch the two sides together. You could pin them to make sure they don't shift while you are sewing but I find that felt sticks to itself so I don't need pins.
When you are starting your first stitch with a new piece of floss you should hide the knot between the layers. I don't know what the name of the stitch I used for the tag is but a regular back stitch has a sloppy side which I figured out with the key chain. Which ever way you decide to stitch it together is fine as long as it is neat on both sides.
Also remember to position the ribbon under the tab while you stitch so that it is hidden. The ribbon makes the tab stronger than felt alone. If you were hanging heavy keys off of it or if it got pulled on often the felt alone might tear.
Stay tuned for the tutes for a felt catnip toy and the fold top felt bag.
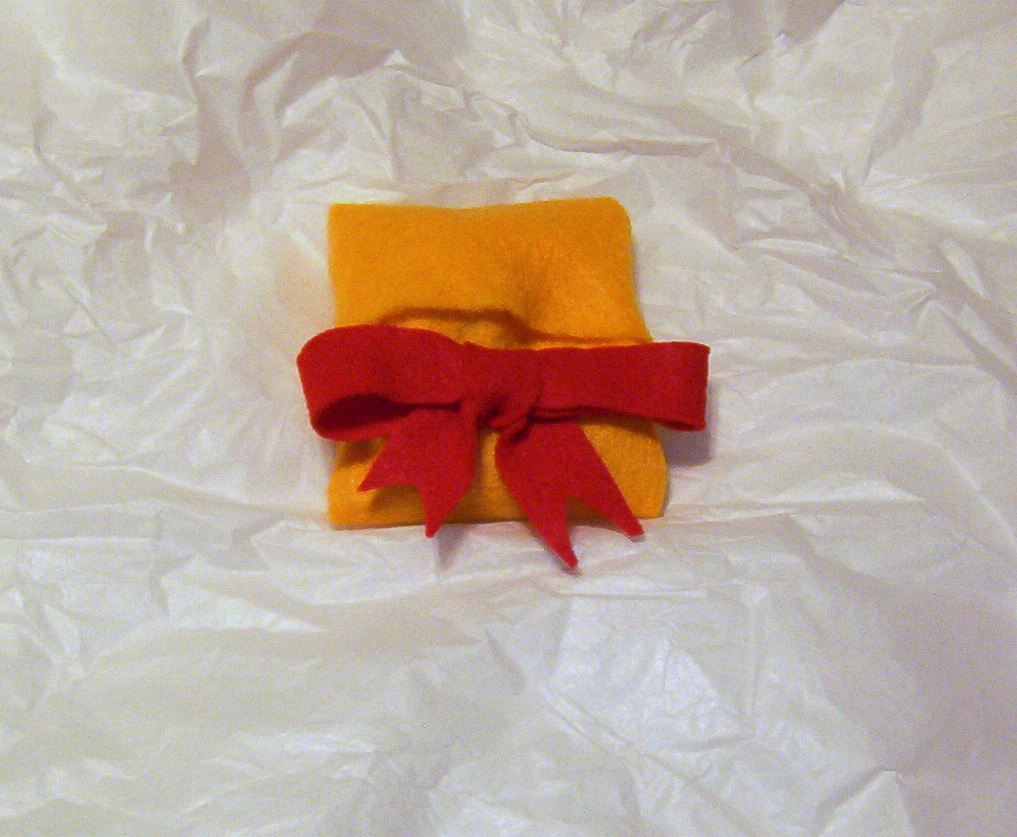
When I found out that this weeks Iron Craft challenge was Valentines I decided that I couldn't make just one, I had to make three. I made one for The Dog, one for The Cat and one for The Man because they all deserve a Valentine. I didn't set out meaning to use felt for all of the projects it just fit each one. I'll do tutes for all of these within the next week so if you like one check back to get the instructions.
The Dogs birthday is very close to Valentines Day so I decided that his could double as a birthday gift as well. I didn't make the doggy biscuits but I did make the gift bag they came in. I got inspired by a set of reusable snack bags I saw on angry chicken but I made mine out of felt and I hand sewed it. I made a cute red bow out of felt and sewed it on as well.
The Cat loves toys and catnip so the obvious choice for him was a catnip toy. This one is a bunny and we have named it Mr. Bun Bun. The Cat has been enjoying Mr. Bun Buns company for a few days now and I think I might make him a whole set of felty friends to go along with Mr. Bun Bun. I know he probably has a mousy friend in his future.
The Man was a little harder to find inspiration for. He is a guy after all and he doesn't really like the traditional Valentines Day sorts of things. Chocolate is always appreciated, heart shaped boxes, not so much. I wanted his Valentine to be useful so I finally decided on a key chain. I cut out a red heart and embroidered it onto black felt then embroidered I (heart) you on the other side.
I am really enjoying these Iron Craft challenges. They are fun and they make you stretch your creative muscles a bit. They are also a nifty way to share your creativity with others. If you haven't checked it out yet you should.


 I haven't done a project for Iron Craft in a little over a month because the past few themes haven't given me any inspiration. This week was different, I came up with an idea almost immediately after reading the challenge theme. I embroidered four handkerchiefs two for my dad and two for The Man's dad.


