Ok, so it's not terribly culinary but The Man and I were reminiscing recently about the rare items on the school lunch menu that we actually liked, and pears and sour cream was a win for both of us. He remembered his mom making it for him when he was very small and she put a cherry on top. My memory of it was of lunch ladies handing me little neutral colored bowls filled with half a pear, a scoop of sour cream and some shredded cheese. I decided to make it his moms way to see if it was as good as I remembered and with the cherry it was way better.

It's easy peasy, you just need some canned pear halves, some sour cream and some bright red maraschino cherries. The pears I used were kind of small so I wound up using four halves, (two whole pears) and about a quarter cup of sour cream per bowl. I also poured a little bit of the syrup from the cherries on top to sweeten the deal and make it pretty. The cherries and the pears are sweet enough that the sour cream becomes almost like yogurt, and I suppose you could use yogurt instead, but I liked that the tang of the sour cream could still shine through the sweetness. It was a successful walk down memory lane for the both of us and you should try it ... and feed it to everyone you love so they'll love it too.
Sloppy Joes are perhaps the perfect food for a weeknight. They taste really great, they are good and filling and they don't cost a lot to make. Oh and if you do it my way it only takes about fifteen minutes to make them.
You'll need:
1 1/2 cups of picante sauce, I used mild but you can use whatever intensity you'd like
1 10 oz can of diced tomatoes and peppers drained, also use your favored intensity
1 lb of browned ground beef
Start off with a skillet on medium heat and toss in a pound of pre browned ground beef. This is what's going to save you so much time. I get a three to five pound pack of ground beef and brown it all up at the same time then store it in quart sized bags in my freezer I use it for soup and tacos and all sorts of things. If you don't want to do that ahead of time you can brown it now but it will take the cooking time up to about a half an hour which is still great. After about a minute or so the meat will warm up and you can toss in your tomatoes and picante sauce and mix it up. Let it simmer for about ten or fifteen minutes until it's the thickness you desire and serve it on hamburger buns with a side of fries. Oh and yes paper plates are the proper dinnerware for sloppy joes ;)
It's that time of year again, time for hearty and comforting foods. I can't think of anything more hearty and comforting than a good bowl of soup. The best thing about this soup is that you can put almost anything in it and it'll be good. The only constant ingredient is a 28oz can of whole tomatoes which I crush by hand. This week I used a 28 oz can of Veg-all which I rounded off with some left over corn and Lima beans from the fridge and some browned ground beef. I've added everything from cabbage to pearl onions to this and it always comes out tasty and if you leave out the meat it's vegetarian. A cube of corn bread on top to soak up the broth and you've got a meal fit for any Autumn night. The basic recipe goes something like this:
1 28oz can of whole tomatoes
1 28oz can of mixed vegetables *
1 14 oz can of corn*
1 14 oz can of lima beans*
1 lb of browned ground beef
*substitute frozen versions or any other veggie you would like.
Start off by pouring the tomatoes into a 4q soup pot and crush them by hand. Mix in all the other ingredients and let it simmer for about 45 minutes, or longer if you use frozen veg. Top with a square of cornbread and dig in.
 Recently The Mom and I went to a huge community wide yard sale and wound up at my uncles house where he and his new wife were having a sale. Both lost their spouses a few years ago and are trying to pare down their belongings from two households. The Mom came across a huge tote full of Christmas decorations that belonged to my aunt so of course she bought it. We waited a while to go through it but when we did I found a little piece of nostalgia. It's a little crocheted boot that I remembered all of my aunts and my mother having when I was a kid, that I'm pretty sure my Aunt Sharon made.
 It's meant to hold a small coffee can and be filled with Christmas treats but this one is good and old, and has seen better days, so I was afraid to wash it. I'm also more of a fan of a darker red and brighter green for Christmas colors so I decided I would make a new one for myself with some scrap yarn that I had on hand. The one my mother had was lost in a fire but I remember that she put in shell mixed nuts in hers. My aunts all used theirs for something different but I remember there being ribbon candy, peppermints, candy canes, and Christmas themed Kisses in these little booties. I think I'll use mine for fancy mix candy this year.
 I did wonder if I could make one in a smaller size as not everyone is going to want something that will hold a twelve ounce coffee can so I went about making one that would hold a cream of mushroom can instead. Oddly enough both cans were about twelve ounces by weight but the coffee can is two or three times bigger. I dug through my scrap yarn and found some DK yarn that I had used in a baby blanket a while back and it dawned on me that in these colors it looks like a baby bootie. These suckers work up pretty quickly so it might make a cute center piece at a baby shower that the mom can take home with her afterwards. It looks good with butter mints in it as well which is a bonus because I never fail to find butter mints at baby showers.
You could also gauge this up with thicker yarn and a bigger hook to use a larger vessel in the middle. For my large one I used Red Heart Super Saver in Cherry Red, Spring Green and White and a size I/9- 5.50 MM Boye hook. I don't remember the brand of yarn I used for the smaller one but it's acrylic DK yarn with a D sized hook. My large grannies measure 3.5 inches squared and the smaller ones measure 2.75 inches squared. If you know how to make a simple granny square use whatever method you favor to make thirteen squares. Sew them together to make the two configurations in the picture below and then follow the instructions to make the boot.
If you don’t know how to make a granny square I’ll add a quick pattern for one near the end of this post. Once you have the boot made turn it right side out and attach your main color yarn to the top of the cuff with a slip stitch in the middle of any chain space. *DC six times in the middle DC of the next three DC on the cuff. Slip stitch in the next chain space.* Repeat from * to * until you come back around to the original slip and slip in that stitch.
Here is the method I use to make a granny square. With color A ch 4 and then 2 DC in the 4th chain from the hook.
Rnd 1 Ch 1 *three DC in the same Ch then Ch1* Repeat *to* twice then slip stitch into the top of the ch3 and tie off.
Rnd 2 Attach color B into any corner of the center square with a slip stitch and DC twice then ch1. *In the next corner 3 DC, ch 1, 3 DC all in the same ch space of the corner. Ch 1.* Repeat from * to * twice. In the corner that you started DC 3, ch 1 and connect to the top of the ch with a slip stitch. Tie off.
I did wonder if I could make one in a smaller size as not everyone is going to want something that will hold a twelve ounce coffee can so I went about making one that would hold a cream of mushroom can instead. Oddly enough both cans were about twelve ounces by weight but the coffee can is two or three times bigger. I dug through my scrap yarn and found some DK yarn that I had used in a baby blanket a while back and it dawned on me that in these colors it looks like a baby bootie. These suckers work up pretty quickly so it might make a cute center piece at a baby shower that the mom can take home with her afterwards. It looks good with butter mints in it as well which is a bonus because I never fail to find butter mints at baby showers.
You could also gauge this up with thicker yarn and a bigger hook to use a larger vessel in the middle. For my large one I used Red Heart Super Saver in Cherry Red, Spring Green and White and a size I/9- 5.50 MM Boye hook. I don't remember the brand of yarn I used for the smaller one but it's acrylic DK yarn with a D sized hook. My large grannies measure 3.5 inches squared and the smaller ones measure 2.75 inches squared. If you know how to make a simple granny square use whatever method you favor to make thirteen squares. Sew them together to make the two configurations in the picture below and then follow the instructions to make the boot.
If you don’t know how to make a granny square I’ll add a quick pattern for one near the end of this post. Once you have the boot made turn it right side out and attach your main color yarn to the top of the cuff with a slip stitch in the middle of any chain space. *DC six times in the middle DC of the next three DC on the cuff. Slip stitch in the next chain space.* Repeat from * to * until you come back around to the original slip and slip in that stitch.
Here is the method I use to make a granny square. With color A ch 4 and then 2 DC in the 4th chain from the hook.
Rnd 1 Ch 1 *three DC in the same Ch then Ch1* Repeat *to* twice then slip stitch into the top of the ch3 and tie off.
Rnd 2 Attach color B into any corner of the center square with a slip stitch and DC twice then ch1. *In the next corner 3 DC, ch 1, 3 DC all in the same ch space of the corner. Ch 1.* Repeat from * to * twice. In the corner that you started DC 3, ch 1 and connect to the top of the ch with a slip stitch. Tie off.
Rnd 3Attach color C to any corner with a slip stitch ch 3, DC 2 ch 1. *3 DC in the next ch space ch 1. 3 DC ch 1, 3 DC in the corner, ch. 1* Repeat from * to * twice. In the last corner 3 DC ch1 attach to the top of the chain with a slip stitch. Tie off sew in your ends.
I also have a few quick tips for working with grannies. Sew in the ends very well, they tend to want to come loose in grannies so you have to pay close attention to getting them good and sewn in. When I have a lot of grannies to make I tend to make them in an assembly line fashion. First I make all of the centers, then I do the second round on all of the squares, then the third round and then I sew in all of the ends. I usually start each round in the same corner so that all of my ends are in the same area when I’m finished. I almost always use a mattress stitch to sew grannies together no matter what I’m making.
Ok to put the structure of the boot together fold square 1 up toward the center and sew it to square 2 then square 3 on the other side. Next fold square 6 up to the center and sew it to 4 then 5. Now fold 7 over and sew it to 4 then 5. Next fold 9 toward 8 and sew those together to form the cuff and then place them over the hole on the lower part of the boot and sew it on taking care to line the squares up.
 I know I haven't posted a blog in over a year but I was employed and busy for most of that time. These days I'm no longer employed and I've discovered a new hobby/obsession. That would be board games. I happened to catch Wil Wheaton's show Table Top on youtube and since then I've been obsessed. Based on an episode of that show I bought the game Zombie Dice. In Zombie Dice you need a method to mark points, up until tonight we had been using pennies. I don't like handling pennies a lot, it may be in my head but they make my hands smell weird. Since I don't like the pennies I decided to make my own markers. I could have just bought a bag of flat marbles and decide to be done with it but I wanted to have brains dang it. So here is how I made my Zombie Dice braaaaiiiins markers.
To make these you'll need clear flat glass marbles, white glue, access to a decent printer and a sheet full of printed out brains. I just went to the interwebs and found a cartoony picture of a brain then repeated it at about 3/4 of an inch across a page. I decided that the light color wasn't cartoony enough so I colored it pink with a magic marker to make it pop a little bit more.
Then I put a dot of glue in the middle of each brain and placed a flat marble onto it, pressing down to make sure the glue spread out and covered the whole picture. Then I let them dry and trimmed the extra paper off.
I really like the way they turned out, the marble magnifies the image so it looks larger than the print out. That helps with the detail you might lose from making the image so small. Now we can play Zombie Dice in style and I can get rid of those pennies.
Ok, I'm gonna do this fast because I've got more packing to do. This week Iron Craft moved to Just Crafty Enough and the challenge this week was to make something with buttons. I didn't take this challenge literally, I decided to make pretend buttons on my project instead. I came up with a quick basic cross stitched button motif then cross stitched it in a grid on two pieces then followed the directions for a biscornu. I think it turned out cute, I might add a magnet backing on it and turn it into a fridge magnet.
Here is the first one I made for the May Flowers challenge: http://24footstreet.blogspot.com/2011/05/iron-craft-18-aprill-showers-floral.html
This week the Iron Craft challenge was to make camp crafts. I was at a loss because when I went to camp we didn't do crafts. I did a search online for camp crafts and came across several I liked including friendship bracelets. I kept them in my head while I was out running errands on Saturday. While I was shopping I swung by the crafts department and found a kit to make friendship bracelets. It came with 36 skeins of "friendship thread" aka pearl cotton embroidery thread. I thought about it for about two seconds and snapped up a kit.
My adult niece and her little boy are staying with us for a while so she and I decided to make these bracelets together. At first we were dumbfounded by the directions. I watched a few youtube videos which explained the patterns pretty well but not the method so I was still not getting good results. Eventually I figured it out on my own but it took some doing so I'm going to try to explain it a little better on here.
First off you need to measure out your thread, this measurement depends on your wrist size so you may need to experiment with how much you need. I have a seven inch wrist so I use twenty six inches of floss per strand. Cut two strands of each color for an easier bracelet or a single strand of six different colors for a more difficult one. You are also going to need some tape, a safety pin or a clip board to hold your thread as you work. I prefer the clip board but the others will do fine as well.
 |
| figure 1 |
Now tie a regular ole granny knot with all of the strands together leaving about a three inch tail. As an optional step to make wearing the bracelet easier braid that three inch tail and tie another knot to secure it. Secure your strands with your tape, pin or board and separate the strands by color. If you're doing three colors separate with the two strands of each color together, if you're doing six colors separate them as single strands.
 |
| figure 2 |
Working from left to right cross the first color over the top of the second color then under it and around it to form a loop. (figure 1) Now while pulling down on the second strand pull up on the first one and tighten it up to the top. (figure 2) Don't make your knots too tight, that causes it to buckle a bit. Tie that same knot again across each color, repeat the process for each row. When you are down to about three and a half inches of loose floss tie another granny knot with all of the strands making it flush against the knots. If you want to, braid that end as well. To wear them just tie the braided ends together.

I know that most people think of fruit when muffins are mentioned but The Man is not most people. He is a chocaholic in the extreme. Naturally with all this muffin making I was bound to come up with a chocolate recipe eventually. Eventually is the right word there because I went through several trial and error recipes to get to the final one and I also learned a very important lesson, if you're trying out a new recipe put a cookie sheet under your muffin pan just in case you have a spill over. Anywhoodles we love this version and I hope you will like it too.
Ingredients:
1/2 cup granulated sugar
5 tbsps melted butter
1 egg beaten
1 cup of milk
1 tsp vanilla extract
1/2 cup cocoa powder
1 1/4 cup all purpose flour
1 tsp each of baking soda and powder
1/2 tsp salt
1 cup of chocolate chips
Preheat the oven to 350 degrees and grease or line 12 muffin cups. Start off by mixing the first five wet ingredients together and then in a separate bowl mix the last five dry ingredients together. Slowly add the dry to the wet and mix it until it is just combined, don't over mix. Pour it evenly into the muffin cups and bake for twenty minutes or until a toothpick comes out clean.
 I haven't done a project for Iron Craft in a little over a month because the past few themes haven't given me any inspiration. This week was different, I came up with an idea almost immediately after reading the challenge theme. I embroidered four handkerchiefs two for my dad and two for The Man's dad.
I like the way they turned out. I printed the monogram and phrase out and then used washout pencils to trace them onto the handkerchiefs. After that it was a matter of simple back stitches. This is the sort of project I enjoy doing. Simple items that will get used rather than looked at. Pretty is nice but pretty and functional is better.
I haven't done a project for Iron Craft in a little over a month because the past few themes haven't given me any inspiration. This week was different, I came up with an idea almost immediately after reading the challenge theme. I embroidered four handkerchiefs two for my dad and two for The Man's dad.
I like the way they turned out. I printed the monogram and phrase out and then used washout pencils to trace them onto the handkerchiefs. After that it was a matter of simple back stitches. This is the sort of project I enjoy doing. Simple items that will get used rather than looked at. Pretty is nice but pretty and functional is better.
This week the Iron Craft challenge was to make something with or inspired by flowers. I decided immediately I was going to make a biscornu this week because I have been wanting to do one for quite a while now. I found a pattern that had flowers on it and I filled it with floral scented potpourri to make it a sachet or just a pretty smelling pin cushion.
I found the pattern on Own Two Hands as well as basic instructions on how to assemble it. It really is a simple assembly so don't be intimidated if you decide to make one. Just a quick tip though, make sure the pattern you use is filled in correctly. I found several spots on my pattern that were incorrect and I ended up having to make several corrections before finishing my project. I found several really cute patterns I'm going to make to give as gifts and even may design my own patterns for them. I don't even like cross stitching that much but I want to make a bazillion of these things.

Forgot to mention that the monogram pattern came from needlenthread.com.
This week the Iron Craft challenge was to make something inspired by money. I'm pretty sure there are a ton of change purses being submitted so far but I decided to go with one anyway. I decided to go with a change purse because thus far Iron Craft has pushed me to do things I have never done before and before this week I had never sewn in a zipper.


Last night I was craving something sweet but we were out of just about everything to make goodies except for the fixings for peanut butter cookies. Well, I wavered on making them because it takes a good long while to make them and it was too hot to have the oven on for that long. My solution was to try making peanut butter muffins instead. I figured that a dozen muffins would take about a quarter of the time to make as two and a half dozen cookies. I'm going to try to play with this recipe a little more and make a PB&J muffin later on. For now the plain peanut butter muffins are as follows:
1 1/4 cups of AP flour
1 tsp of baking soda
1 tsp baking powder
1/4 tsp salt
1 cup of milk
1 cup of peanut butter (chunky or smooth)
1/2 cup granulated sugar
5 tbsp melted butter
1 egg beaten
Preheat the oven to 350 degrees and grease or line 12 muffin cups. Sift the first 4 ingredients together and set them aside. Mix together rest of the ingredients thoroughly and then combine the dry into the wet. Mix them well but not too much. Evenly fill the muffin cups about a third of the way full and bake for 20 to 25 minutes until a toothpick inserted into the middle muffin comes out clean. Remove from the pan immediately.
This week the Iron Craft challenge theme was postcards. At first I was rather stumped because paper is not my usual medium but I tried a few things. The first ones I did were altered book pages and they are too embarrassing to show pictures of. Then I got some scrapbook paper and tried some things with it. Those are slightly less embarrassing, enough so that I can show pictures. The first is an owl and the second is a masquerade mask of an owl.


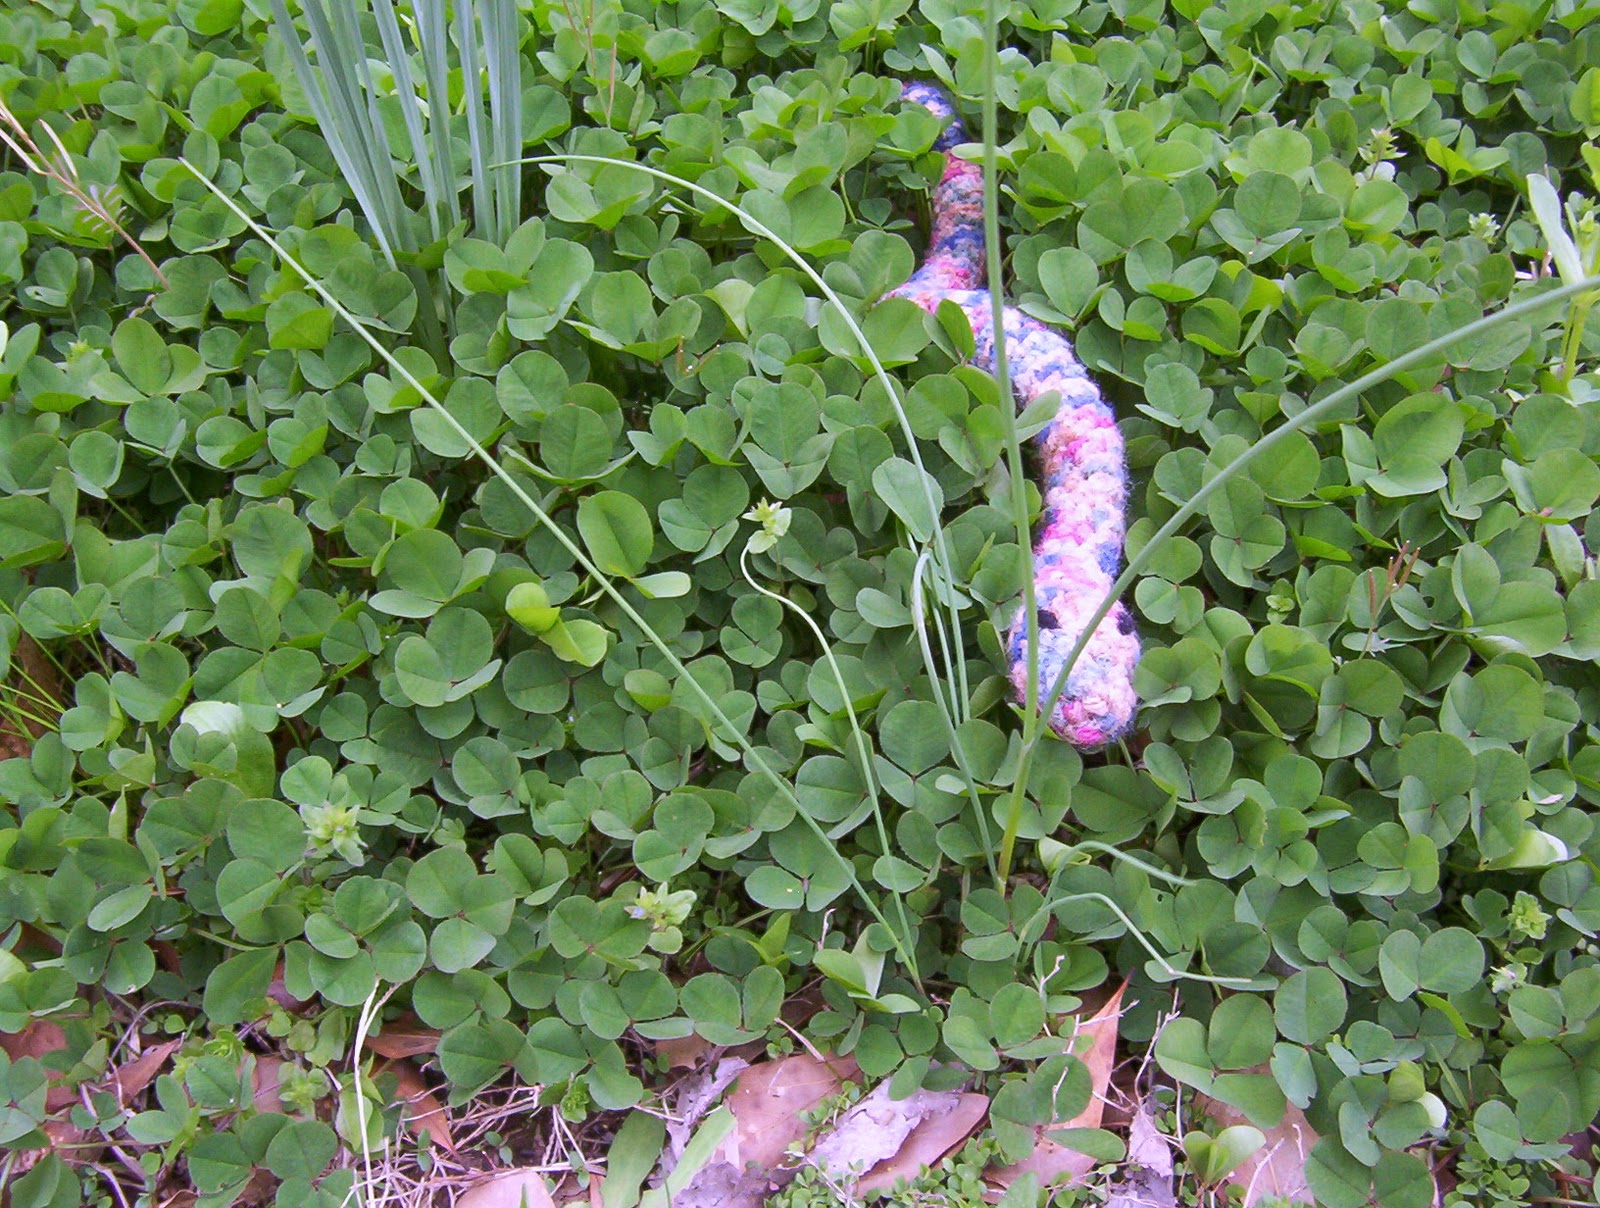
This week the Iron Craft challenge was "Best In Show" aka pets. Since I had made a bunch of cat toys prior to this challenge I decided I didn't want to make another. I Also couldn't come up with anything to make for The Dog. He is old and doesn't play much and would rather sleep on an old pillow or blanket than a pet bed. I eventually decided that I would make a pet for myself. Yes a completely inanimate and not real pet but one that I've wanted pretty much my whole life, a snake. See The Mom is deathly afraid of snakes so I will never be able to have one. I have always been fascinated by snakes, more than likely her reaction to them is what sparked that fascination after all when you're six being able to make your mom scream like a baby is pretty entertaining.

Recently I blogged about a vintage craft book I received and said I would be trying one of the projects soon. Well life sort of got in the way and I didn't do the project I had set out to do. This past week I did create a project using inspiration from the vintage book.
In the book there are crocheted pillows with ruffled trims and embroidered details. I decided I would update that pillow and do my own thing. I started out making the grid with scrap colors and I liked it but a new idea came to me as I was crocheting. I set that project aside (I'll be going back to it) and I picked up some black, grey and baby pink red heart yarns.

Long checked strip make two. With color A Ch 9 sc in the 2 ch from the hook and across 8 scs. Sc across for ten rows then change to color B. Sc for 10 rows then change to color A. Change color every ten rows twice more to end up with 50 rows. Fasten off
Single block make 2 of color A and 4 of color B. Ch 9 sc in the second ch from the hook and every ch across. Ch 1 turn sc in every sc across repeat until there are ten rows. Fasten off.
Middle pannel sew three blocks together with the chain edge on the bottom in order BAB. With color A join with a sl st in the corner of this strip ch 1 and sc in each sc across 24 scs. Repeat this row 29 times to get 30 rows. Fasten off. Sew the other three single blocks together in the same manner as before then sew them onto the top of the middle panel.
Back pocket ch 41 sc in the second ch from the hook and across. Ch 1 sc across until the piece is 40 rows. Fasten off.
Back flap ch 41 sc in second ch from hook and across. Ch 1 sc across 17 more times until there are 18 rows. Ch 1 sc in the next 4 sc ch 2 sk 1 sc * sc in the next 9 sc ch 2 sk 1 sc repeat from * twice more then sc in the last 5 scs.
Assembly: Sew the side strips to the middle panel then attach the motif or medallion onto the front of it being careful not to skew the medallion. Then with right sides facing sew the back pocket panel onto the front panel on three sides and the flap onto the top with the button holes facing the pocket panel. ONLY SEW THE FLAP ON THE TOP SEAM. Sew the buttons onto the pocket flap on the 8th row in corresponding stitches to the button holes.
This week the Iron Craft challenge theme was "Wanna Get Lucky?" The point was to draw inspiration from something that is considered lucky somewhere in the world. I had a bit of a snag at first because I wanted to do Rachel Morgans lucky charm handcuffs from The Hallows series by Kim Harrison. The problem was I couldn't find the right charms and I couldn't get the supplies to make them.
I thought for a while and got kinda ticked about it but then I realized I have "lucky" inspiration staring me in the face in almost every room of my house. The Mom collects elephants which are supposed to be lucky. Well she doesn't actively collect them everyone she knows collects them for her.
So with new inspiration at hand I ran to the store and bought some suitable elephant yarn and searched the interwebs (mainly Ravelry) for an elephant crochet pattern. I found this one from Better Homes and Gardens. I didn't add the sash and head scarf and I kinda put his head on lopsided but I think it made him cuter. He looks a little like a curious kitten this way.
I had never completed an amigurumi pattern before because it makes my hands hurt after about ten rounds. I toughed this one out and finally got all of my pieces made. Making the pieces took a lot less time than I thought they would and assembly took a lot more time than I had figured on. I went through all of Monday nights tv and a Poirot DVD to get this one done. Oh I broke my plastic G crochet hook too. I almost never use that one and I guess I'm sticking with steel ones in the smaller sizes from now on.
I'll do more amigurumi in the future but I think I'm going to stick to smaller animals. I have an adorable little bee pattern and an owl one I've been looking at for a while. I am really loving that Iron Craft is pushing me to do things I haven't done before.
This week the Iron Craft challenge was the color green. I decided to make a lapghan for The Man for his birthday coming up. To go with this challenge I used Red Heart yarn in Bright Yellow, Royal Blue and Paddy Green and a simple double crochet ripple pattern. I found the pattern on the Lion Brand Yarn website, it is called Spring Ripple Throw. It was an easy pattern to keep up with because the repeat goes in threes. You double crochet for three stitches then double crochet three together then double crochet for three stitches and then increase by three in the next stitch. It became like clockwork after a few lines.
This weeks Iron Craft challenge theme was movies. I took a long time trying to get some inspiration for my project. I finally realized that the best part of most movies are the memorable lines so I decided would use a line from my favorite movie The Princess Bride as my project. I cross stitched "As you wish." out and then glued it into a card. I chose to make a card because The Mans birthday is coming up and anyone who has seen the movie knows that when Wesley says "As you wish." to Buttercup what he is really saying is "I love you."